

If your mix sounds overcrowded, or your EDM track lacks that pumping effect a dancefloor hit requires, sidechain compression might be the solution to all your problems.
In this article, we’ll take a look at what sidechain compression is, how to use it and when. To keep things practical, I’ll also include a quick tutorial with a track made using sounds from Sample Focus.
Let’s dive in.
- What Is Sidechain Compression?
- Why Producers Use Sidechain Compression
- How to Set Up Sidechain Compression (Step-by-Step)
- Creative Sidechain Techniques
- Sidechaining Issues
- Final Thoughts
What Is Sidechain Compression?
Sidechain compression is when the level of a track triggers a compressor that controls the level of another one.
The compressor's input is fed by the signal from the second track, then compresses the first track in response, turning down the volume of that track when the sidechain track is active.
The result is that “pulsing sound” you often hear in electronic music tracks, when the bass leaves room for the kick when it hits, then gradually comes back, and then "ducks” back again.
Why Producers Use Sidechain Compression
In short, sidechain compression allows you to free space in your mix, and enhance the power of your beat by giving it the spotlight.
It’s become a crucial effect in EDM music, but you can find this modern production technique across genres, from pop to hip-hop, rock, and more.
Here’s why sidechain has become such a critical element of music production over the years:
- It creates space for the kick drum: In most electronic and dance tracks, the kick drum is what pushes the song forward. When you sidechain the bass or other low-frequency sounds to the kick, you make your mix cleaner and allow the kick to cut through.
- It adds groove and movement: Sidechaining creates a pulsing effect that follows the beat and adds a sense of motion to a song.
- It prevents frequency clashes: When two instruments occupy the same frequency range, like a bassline and a kick, they can mask each other. Sidechain compression helps you avoid that.
How to Set Up Sidechain Compression (Step-by-Step)
For the purpose of this article, I created a simple techno track and applied sidechain compression to the kick. Here’s the result:
I made my track using Studio One, but most modern DAWs will have a similar workflow, so I’m pretty sure you can do almost the same process on whichever workstation you’re using.
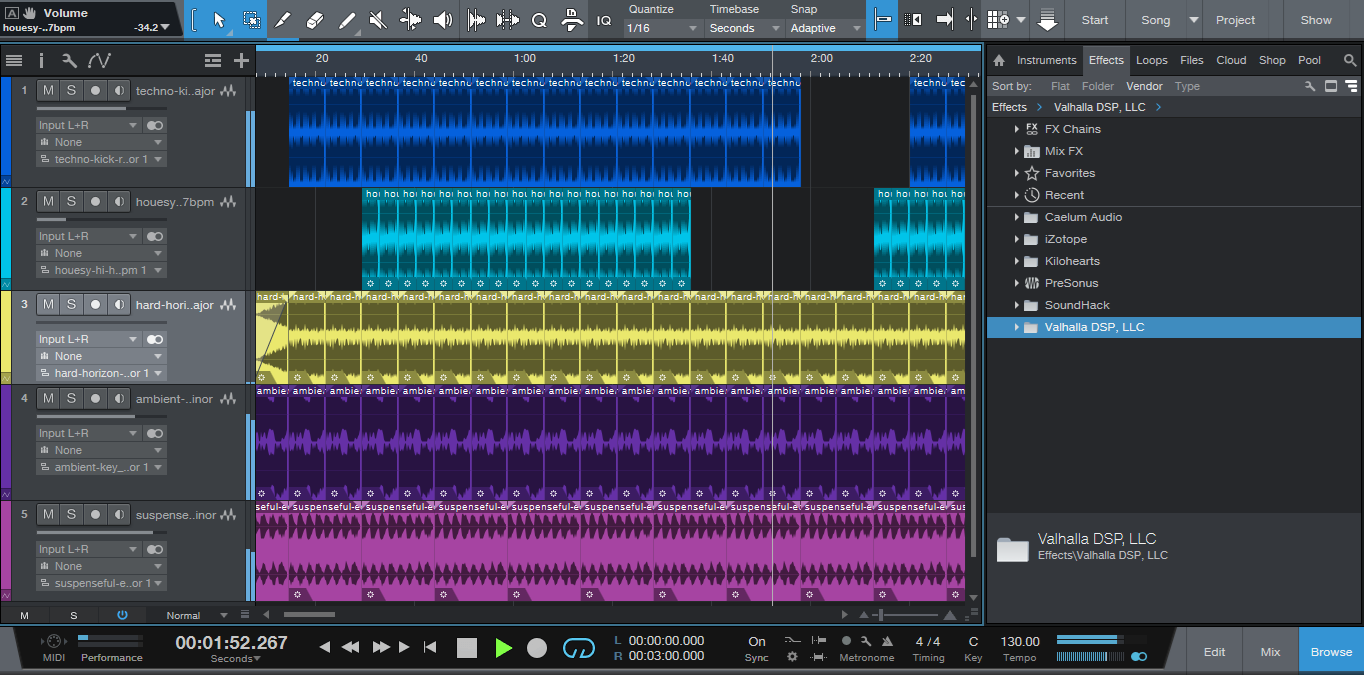
Step 1: Decide What to Sidechain
I’m going to assume you’ve already created a full track, so we won’t go over the sample selection and mixing processes. If your track is not quite ready yet, stop for a moment and check out my article on mixing sample-based tracks.
Now it’s time to decide which sounds you want to duck, and which one should trigger the ducking. In most cases, the kick drum activates the ducking, but options are endless: you can even sidechain dynamic EQ vocals to place them upfront in your mix.
For this tutorial, I created an instrumental EDM track, so my goal is to use sidechain compression to enhance the beat.
Now, which sounds should duck to create a pulsing effect? If you want the kick drum to be more prominent, it needs to have less low-end competition; therefore, the obvious options are the bass and synth sounds that affect mostly lower frequencies.
You can even decide to sidechain all sounds to the kick drum, which is ultimately what I did with my EDM piece. I like the track this way more, but I also wanted to make the sidechain compression quite evident, for the purpose of this piece.
If you want to hear how my tune sounds with only the synth bass sidechained to the kick, here it is:
Step 2: Add a Compressor
Add the compressor to the track you want to duck. This will be the sound that gets compressed. Any compressor should be good enough, as long as it offers the option to sidechain sounds; all the compression plugins in my library do, so I guess it’s a common feature.
Step 3: Enable Sidechain Mode
Look for a sidechain or external input option on your compressor.
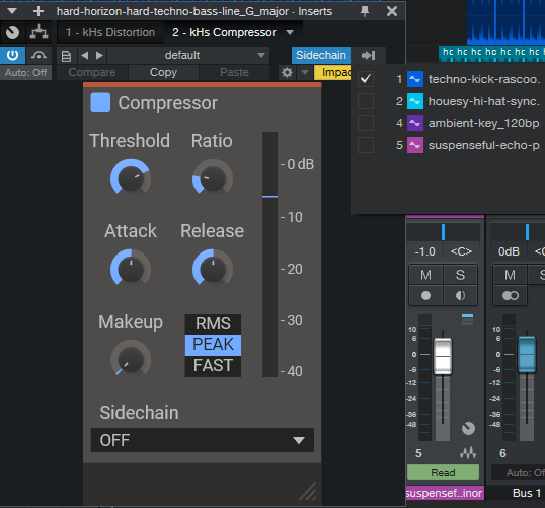
I’ll show you how things look like in my DAW:
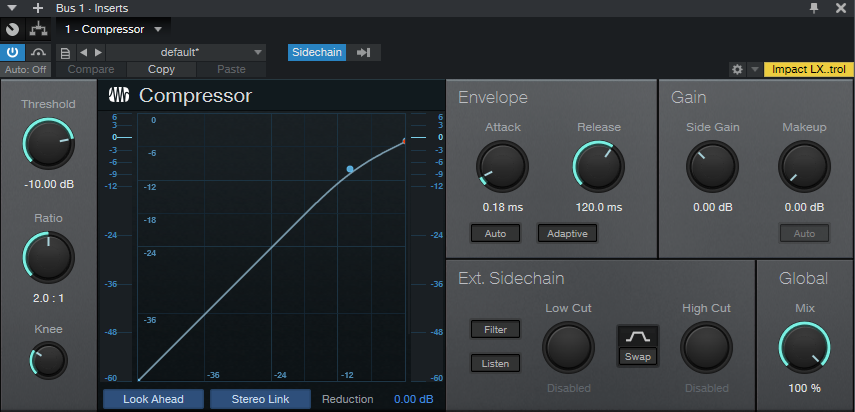
This is the sidechain compression I used for my track. It’s in a bus mix that comprises all elements of my tune but the kick drum.
As you can see, the Sidechain button is activated. Different compressors and DAWs might have slightly different workflows, but in general, after activating the sidechain, all you have to do is select the track that triggers the ducking.
Step 4: Adjust Compression Settings
Take a look at the image above. The crucial parameters on a compressor are:
- Threshold: How loud the trigger signal needs to be before compression happens. Lower thresholds = more compression.
- Ratio: How much compression is applied. Higher ratios = more obvious ducking.
- Attack: How quickly the compressor responds when triggered. Faster attack times = sharper ducking.
- Release: How quickly the sound returns to normal volume after the trigger stops. Short releases = snappy sound, and longer releases = smoother pumping.
If you just need some subtle headroom control, try a fast attack (around 1-10 milliseconds) and a release that's around your kick's length (roughly 200-400 milliseconds).
If you want a classic pump effect, go for a slower attack (10-30 milliseconds) and a longer release (300-800 milliseconds).
Trust your ears, and keep trying until you find the sweet spot. No golden rules here.
Creative Sidechain Techniques
Sidechaining to Delayed Signals
If you want to give your track a bit more swing, try routing your trigger signal through a short delay before it hits the compressor.
When done well, a delay of around 50–100 milliseconds will enhance the rhythmic pumping effect and add unpredictability to your track.
Ghost Sidechaining
The name might be confusing, but this is likely an effect you have heard many times in EDM tracks and clubs.
Create a muted MIDI or audio track with a rhythmic pattern and use it as the sidechain trigger. Even though listeners can’t hear the sound source, they’ll feel the beat movement.
Ramiro explains it very well in this short clip:
Dual Sidechaining
If two instruments occupy a similar frequency range, sidechaining them to each other can be a great way to tidy up your mix. Each one will duck slightly when the other plays, which will keep the mix balanced without having to go through much manual automation.
Sidechaining Issues
One of the most common mistakes, especially in electronic music, is over-compression. We tend to believe that the more powerful the pumping effect, the more engaging the song is. However, if the threshold is too low or the ratio too high, your sounds might disappear entirely when the effect kicks in.
Don’t forget to carefully calibrate the attack and release times. If the attack is too slow the kick and bass will still clash before the compressor reacts, and if the release is too quick the sound might snap back too fast and make the song lose its flow.
Finally, don’t feel the need to sidechain everything, or to use the effect at all. When used correctly, sidechain compression can add space to your mix and create an engaging beat, but sometimes, careful mixing and EQing can give similar results without making your rhythm sound mechanical or hollow.
Final Thoughts
Focus on preserving the natural flow of your mix, while making it more powerful and engaging. And whenever you feel ready, head over to Sample Focus and download the best kick drum and bass synth patterns to practice your newly acquired sidechaining knowledge!
Comments