
Step sequencers give you control over your rhythms and melodies when making music. Whether using step sequencer software, VST's or even if you're using Logic Pro, Ableton Live, or another DAW – it's important every prodcer understands step sequencers and how to use add into your workflow.
Let's break it down together. You'll see everything you need including specific settings and techniques to optimize your workflow.
Overview
- Step sequencers are useful for music production, allowing for precise control over rhythmic and melodic patterns.
- A step sequencer is a type of music sequencer that divides a pattern into equal steps, where each step can trigger a note or sample.
- Key features of step sequencers include a grid-based interface, control over step resolution, velocity, pattern length, and swing/groove.
- Step sequencers can be used effectively in various DAWs like Logic Pro, Ableton Live, FL Studio, and GarageBand, with specific workflow tips for each.
- For step sequencer software, start simple, experiment with velocity and dynamics, layering patterns, and syncing with external gear.
What is a Step Sequencer?
A step sequencer is a type of music sequencer that divides a pattern into equal steps. Essentially it's a music production tool that breaks down a pattern into equal steps. Each step can be programmed to trigger a note or sample. That's why it became popular to make loops and rhythmic patterns. While they’re mostly used in electronic music, step sequencers can be used across various genres.
Key Features of Step Sequencers
- Grid-based Interface: A visual grid layout for easy step programming.
- Step Resolution: Control the timing and length of each step.
- Velocity Control: Adjust the volume and intensity for each step.
- Pattern Length: Set the number of steps in your sequence.
- Swing and Groove: Add a human touch to your patterns with swing and groove settings.
A Breakdown DAWs Step Sequencers
Step sequencers help you create precise rhythmic and melodic patterns. Each DAW has it's own way of using them, so we'll break them down one by one.
Here's how to get started.
Logic Pro Step Sequencer
Logic Pro, you can dive into the step sequencer by navigating to the “Window” menu and selecting "Step Sequencer" to customize your pattern length and step resolution.
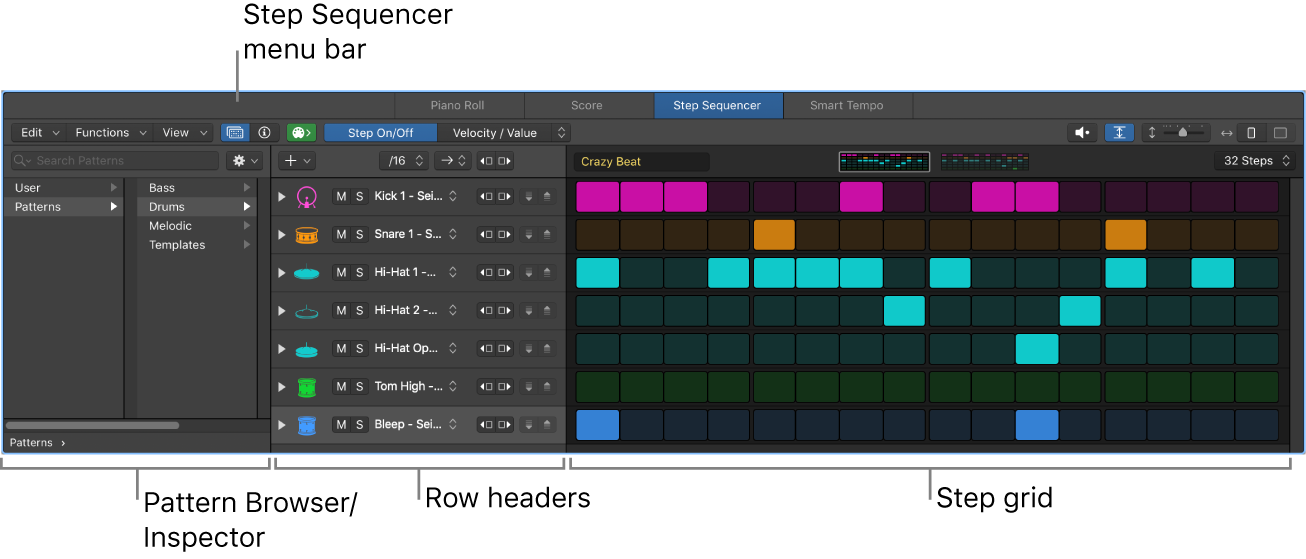
Open the Step Sequencer:
- Navigate to the “Window” menu and select “Step Sequencer.”
- Or use the shortcut
Cmd + 4.
Creating a Pattern:
- Select an instrument track and open the step sequencer.
- Choose your pattern length and step resolution. This sets the stage for your beat.
Editing Steps:
- Click on the grid to activate steps.
- Adjust the velocity and other parameters using the inspector.
- This is where you can fine-tune the feel of your pattern.
Adding Variations:
- Use the “Pattern” and “Step” buttons to add variations and dynamics.
- This keeps your sequence from getting repetitive and boring.
Step Sequencer in Ableton Live
Ableton Live’s step sequencer integrates smoothly with its clip-based workflow, enabling intuitive note activation and dynamic adjustments. Follow these steps to use it:

- Launch the Step Sequencer:
- Select a MIDI track and load a drum rack or instrument.
- Open the clip view and switch to the step sequencer.
- Programming Beats:
- Click on the steps in the grid to activate notes.
- Use the “Accent” button to add dynamics.
- Advanced Techniques:
- Utilize the “Nudge” and “Move” functions to shift notes.
- Apply swing and groove settings from the Groove Pool.
Step Sequencers in Other DAWs
FL Studio and GarageBand also offer accessible step sequencers, making it easy to input and adjust notes.

- FL Studio:
- Open the “Channel Rack” and use the step sequencer to input notes.
- Adjust step parameters and use the Piano Roll for finer control.
- GarageBand:
- Access the step sequencer from the “Drummer” track or use third-party plugins.
- Simple yet effective for beginners.
As you can see, step sequencers in Logic Pro allow you to create intricate patterns by navigating to the “Window” menu, selecting "Step Sequencer," and customizing your pattern length and step resolution.
In Ableton Live, you can intuitively use the step sequencer by loading a drum rack or instrument on a MIDI track, activating notes in the grid, and adding dynamics with the “Accent” button. For FL Studio and GarageBand, step sequencers offer easy note input and adjustment, ideal for both detailed control and beginners.
Popular Step Sequencer Plugins
Step Sequencer VSTs
- Rozzer Advanced Step Sequencer:
- A versatile plugin offering complex sequencing capabilities.
- Features include polyphonic sequencing, MIDI effects, and modulation.

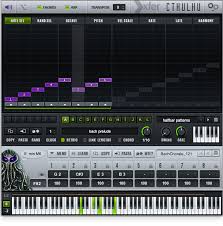
- Xfer Records Cthulhu:
- Combines chord generation with an advanced step sequencer.
- Ideal for creating intricate harmonic patterns.
MIDI Step Sequencers
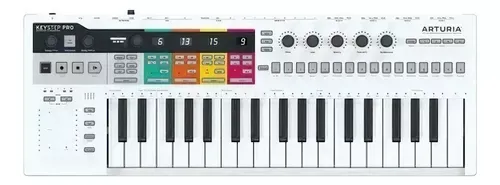
- Keystep Pro by Arturia:
- Hardware sequencer with MIDI control.
- Features polyphonic sequencing and real-time performance capabilities.
Recap and Tips on Using Step Sequencers
Start Simple:
- Begin with basic patterns and gradually add complexity.
- Focus on getting the timing and feel right before adding variations.
Use Velocity and Dynamics:
- Experiment with different velocity levels to create dynamic sequences.
- Use automation to add movement and interest.
Layering Patterns:
- Combine multiple step sequencers to create rich, layered textures.
- Use different patterns for drums, basslines, and melodies.
Sync with External Gear:
- Integrate your step sequencer with hardware synths and drum machines.
- Ensure all devices are synced to the same clock for tight timing.
Final Words
Logic Pro, Ableton Live, or any other software you first want to find what works best for your style. Start simple by mastering basic patterns and timing before adding complexity. Experiment with velocity and automation to create dynamic sequences. Layer multiple step sequencers for rich textures and sync with external gear for precise timing.
Comments