
The sound of classic beats of the 90s stand the test of time. In part this is because of the iconic boom-bap vibe. If you want to get that authentic 90s sound you need attention to detail. One common mistake is overprocessing drum samples. This creates a sound that lacks the tight, punchy feel of 90s classic beats.
Today we'll show you techniques for sampling 90s classic beats in FL Studio. Focusing on keeping the drums authentic and making the most of your samples – just as producers did in the 90s.

The Essence of 90s Classic Beats
The sound of the 90s worked because it was raw. Sampling was limited due to the hardware constraints of the time. Early samplers had limited memory. So producers had to find creative ways around this by using multiple samplers. Common examples are the SP-1200, MPC, and Akai S950. This expanded their sample time and gave a distinct character to their beats because of the different sample rates and bit depths.
Key characteristics of 90s beats:
- Punchy, crisp drums: Drums were tight, often layered, and minimally processed.
- Limited sample rates: Hardware limitations added a raw quality, particularly in the low-end.
- Loop-based structures: Loops were carefully chosen and manipulated to fit into tight bars.
- Layering techniques: Often required to add depth without excessive processing.
Step 1: Selecting Your Samples
- Drums: For a classic 90s feel, prioritize drum sounds from vintage machines like the SP-1200 or MPC60. These drum sounds are raw, often gritty, and punch through a mix with minimal tweaking.
- Use Sample Focus or other libraries to find drum one-shots that have a slightly "dirty" quality.
- Melodic Loops: Choose loops that feature jazz, soul, or funk elements, as these were the main influences for 90s producers.
- Trim the loop to 4 or 8 bars to maintain the rhythmic quality.
- Vocal Chops: Vocal samples add authenticity to the beat. Look for short vocal snippets to add texture and rhythm to your loops.
Step 2: Importing and Chopping in FL Studio
Once your samples are ready, it’s time to bring them into FL Studio.
- Import: Drag and drop your samples into the Playlist or use the Channel Rack for one-shot drums.
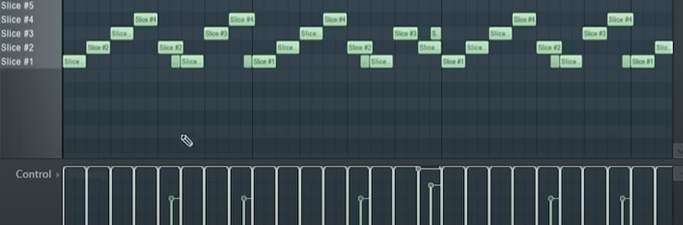
- Slice: For melodic loops, use Edison to slice your samples. Choose a manual slicing approach to control each cut precisely.
Pro tip: Slicing on beat markers ensures that your chops are consistent, allowing for tighter timing and rhythm.
- Assign to Pads: If you have a MIDI controller, map the slices to your pads, emulating the 90s workflow. This setup is similar to how producers would use the MPC to trigger samples.
Step 3: Layering Drums and Adding Punch
For that boom-bap sound, layering drums correctly is essential.
- Kick Layering: Use a "thump" kick from a sampled drum machine and layer it with a lighter kick for punch. Adjust the pitch to get the kicks in tune.
- Snare Processing: For snares, layer a high-pitched clap or rimshot with a low-pitched snare. This creates a more impactful, gritty sound.
- EQ Tips: Cut the lows below 200 Hz on snares and boosts the upper mids around 2-4 kHz for clarity.
- Hi-hats: Add subtle swing to hi-hats by adjusting the note timing in FL Studio’s Piano Roll. Slight timing adjustments emulate the classic swing of 90s beats.
Step 4: Time-Stretching Samples
To match your loops with the BPM of your project, time-stretching is essential.
- Set the Tempo: Choose a BPM between 85-95 for that classic head-nod effect.
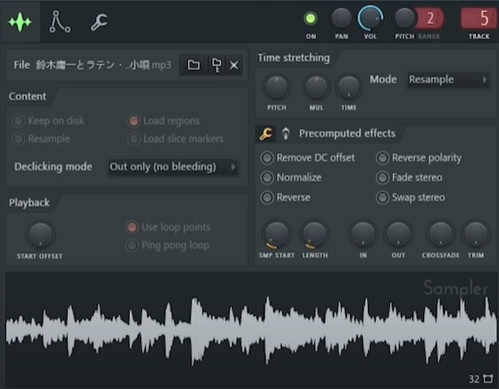
- Stretch Method: Use Stretch mode in FL Studio's Channel Settings for your looped samples. This will maintain the pitch while altering the duration.
- Fine-tune: For tighter sync, adjust start and end points within Edison. Listen carefully to make sure the stretch doesn’t distort the audio quality.
Edison will help you work around settings for time-stretching and resampling.
Step 5: Adding Grit with Bit Reduction and Low Pass Filtering
Low-fidelity effects help achieve the raw quality of 90s beats.
- Bit Reduction: Use Fruity Squeeze or a similar plugin to reduce the bit rate, adding a touch of "grit" to your samples.
- Low Pass Filtering: Emulate hardware samplers by adding a low-pass filter on your samples, removing the high end for a warmer sound.
- Frequency Cutoff: Start around 5-6 kHz and adjust to taste. This will help focus the sound on the mid and low frequencies, typical of 90s production.
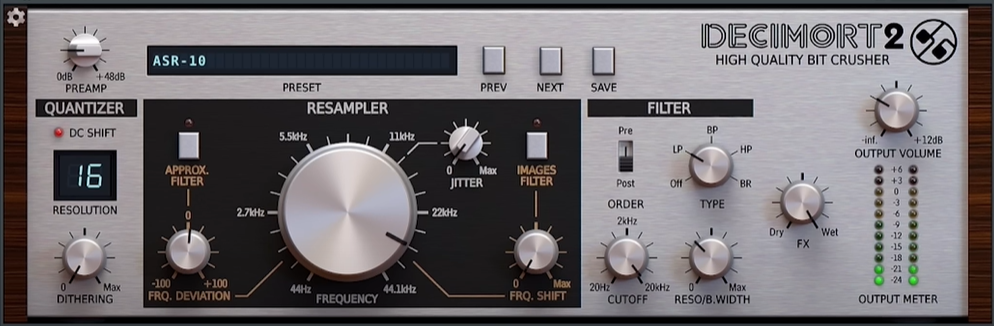
You can also use the Decimort 2 plugin, which is a bit crusher used to add grit and character to the sample.
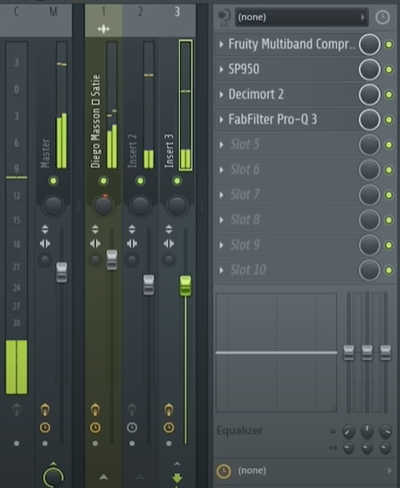
Step 6: FL Studio Mixer with Effects: Compression and EQ
Classic 90s beats were minimally compressed to retain dynamics. However, subtle compression on drums can enhance punch.
- Drum Compression: Use a light ratio, around 2:1, with a quick attack to tighten the transients.
- Parallel Compression: Mix an uncompressed drum signal with a heavily compressed one to keep the dynamics but add extra punch.
- Final EQ: Apply EQ sparingly. Boost around 100 Hz on the kick, cut muddy frequencies in the 200-400 Hz range on all elements, and avoid excessive high-end boosts.
Step 7: Creative Tips for a 90s Aesthetic
- Add Vinyl Noise: Use a plugin like Fruity Convolver or sample vinyl noise to emulate record hiss, giving your track that 90s feel.
- Use Reverb Sparingly: Short, room reverbs add space without overwhelming the sound.
- Vocal Samples: Pitch down vocal snippets to make them blend into the background and enhance the atmosphere.
Final Words
Sampling 90s classic beats means having creativity and restraint. You need to find authentic sounds, layer drums properly, and make use of time-stretching and bit reduction techniques. That's the way to recreate that vintage feel while keeping the sound fresh. Avoid overprocessing and prioritize simplicity in your arrangement. These methods will help you produce tracks that capture the true essence of the 90s while making you sound different.


Comments