

Audio mastering is a mysterious process: often it’s about making some minor adjustments that don’t seem to add anything to a track. And yet, sometimes, it can turn a lifeless mix into a vibrant and cohesive song ready for distribution.
When it comes to hip hop, mastering is the secret ingredient of most hits. Why? Because that’s when the raw power and cavernous bass of your piece really come to life. Without mastering, you might have a good song in your hands, but definitely not one that’ll galvanize your listeners.
With this article, we’ll take a look at the most important aspects of mastering a hip hop track, with a particular focus on sample-heavy tunes and the best mastering chain for hip-hop and rap.
- What is Mastering?
- A Good Master Won’t Fix a Bad Mix
- The Importance of Reference Tracks
- The Tools You Need
- EQ
- Compressor
- Limiter
- Stereo Imaging
- Other Effects (saturation, distortion, reverb)
- Final Thoughts
What is Mastering?
Before we get started, it’s important to define what mastering is, and how it differs from mixing, the other super important post-production process.
Mastering is what gets your final mix ready for publication. The mastering engineer makes (usually) subtle changes to EQ, dynamics, and stereo balance so that your track sounds as polished and loud as a professionally produced song in your same genre.
For hip-hop producers, mastering means bringing together sounds from different samples and making them feel tight and cohesive. This is accomplished by using effects that affect every part of the mix in the same way, as opposed to the mixing process, where the engineer makes adjustments to every instrument individually.
A Good Master Will not Fix a Bad Mix
Even experienced musicians sometimes believe that a master will fix “everything” that doesn’t sound right in their track. More often than not, the opposite happens: mastering will enhance all the untamed sounds and frequency clashes in your mix, making it sound worse.
Reality is, every step has to be done with care, from sample selection to recording, mixing, and mastering. Every process affects the one that comes after it, and ultimately defines the quality of your work.
Remember to leave about -6 dB of headroom for the mastering process, otherwise you or the mastering engineer won’t have enough space to work.
The Importance of Reference Tracks
Recently we talked about the importance of reference tracks in an article on mixing, and when it comes to mastering, they’re just as crucial.
A reference track is a professionally made song that artists use as a guide when making their own production decisions. By comparing your master to a song that already sounds good, it's easier to decide how to balance sounds, control the frequencies, manage the loudness, and so on.
The reason why this is crucial should be obvious; if you already have examples of songs that sound good, it means you can use those songs to inform your post-production process, as well as use those effects and plugins that can help you recreate that sound signature.
The Tools You Need
EQ
EQ helps balance your track.
In hip-hop and rap, you should focus on making the bass clear and strong, without making the mids sound muddy and leaving room for the vocals in the mid-to-high range.
Every track is different, but to get started, try the following: cut the sub frequencies below 30Hz to remove unnecessary rumble. Next, gently boost around 60 to 80Hz to highlight the kick, or 100 to 200Hz to make the bassline fuller.
If the track sounds boxy, reduce 250 to 400Hz to make more room, and also boost a little between 5 and 8kHz to make your track brighter and enhance high elements.
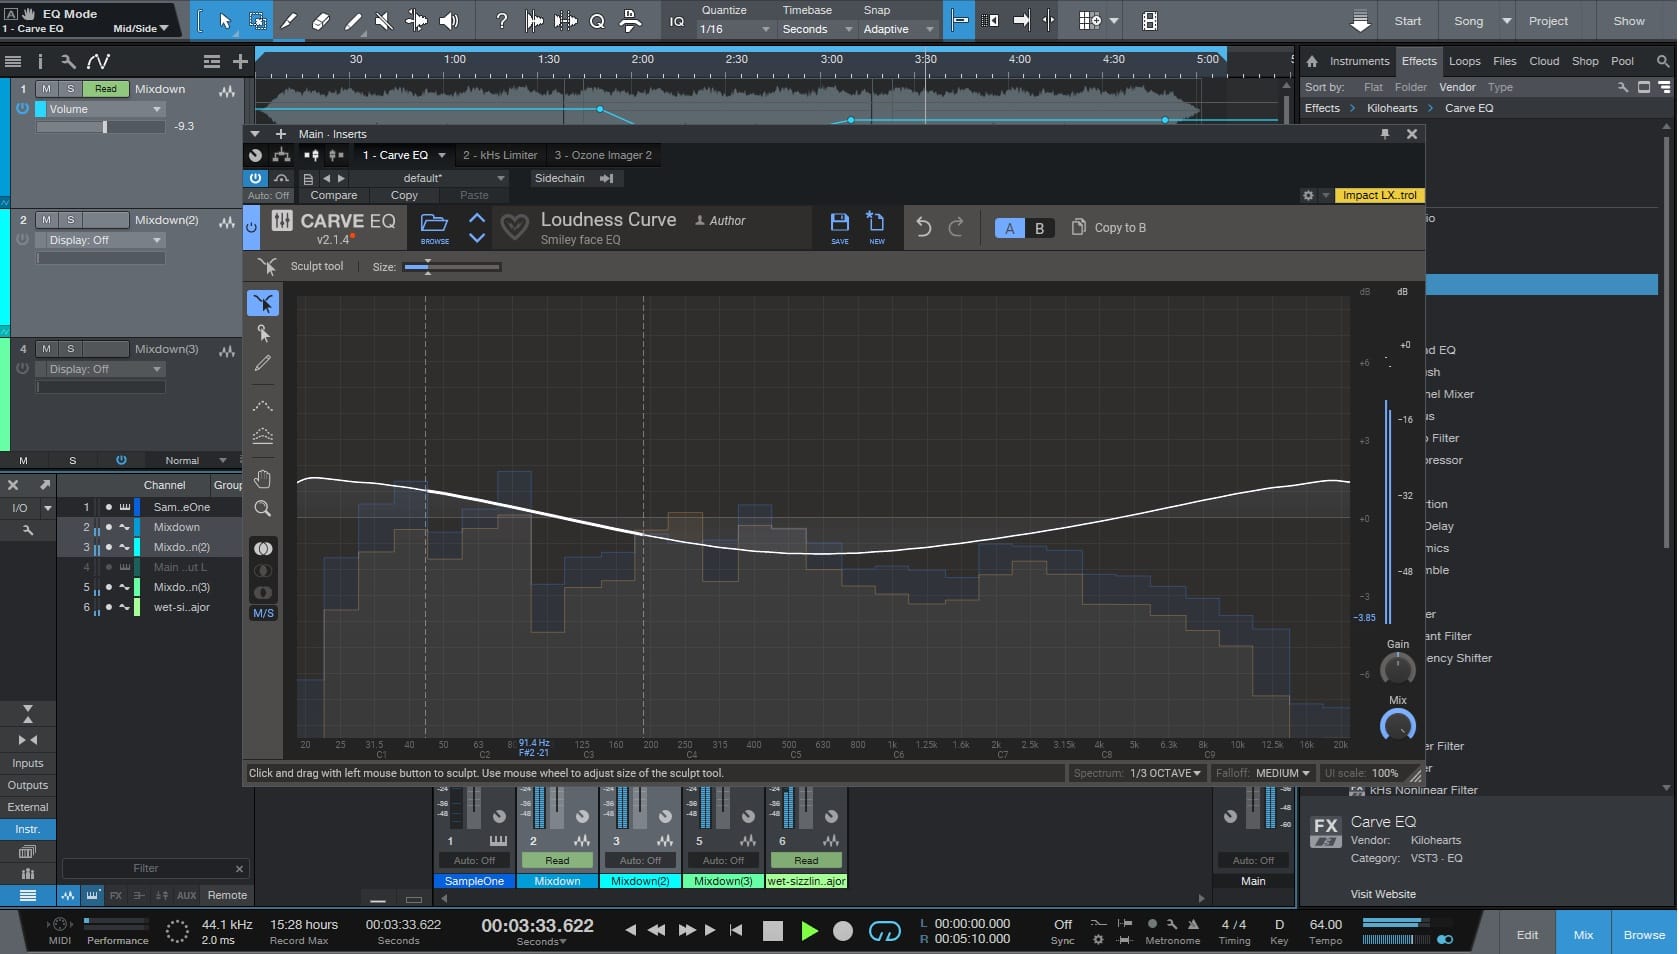
What you can use at this stage is a combination of parametric EQ, perfect for surgical work on your track, and dynamic EQ, which lets you control certain frequencies only when they get too loud, like harsh hi-hats or sibilant samples.
Compressor
Compression when mastering can be tricky; when used well, it adds punch and glue, but too much will suck the life out of your mix.
Pay attention not to squash the dynamics, but rather to help everything sound balanced, powerful, and alive.
Try low ratios around 1.2:1 to 1.5:1, and just 1 to 2 dB of gain reduction.
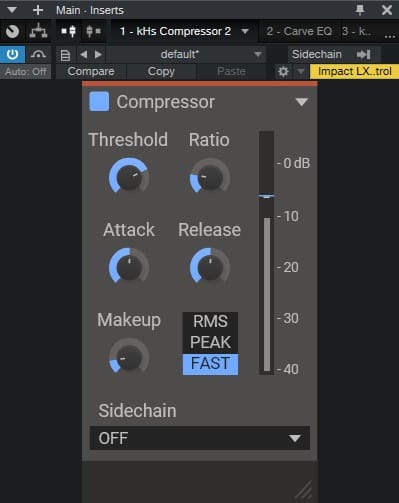
Set a slow attack, between 30 and 100 ms, so your beat still hits hard, and adjust the release to match the rhythm of your tune. If the release is too fast, the sound will 'pump'; if it’s too slow, the track may sound dull. Try until you reach the sweet spot, and trust your ears.
If your low end feels uneven, a multiband compressor can target specific frequencies without changing the rest of the mix. A great option is also to use two compressors in a row, say one for subtle control and another for tone or warmth.
If your mix already sounds good and energetic, don’t use a compressor: if the master breathes naturally and keeps the energy intact, it’s good to go.
Limiter
Limiters are safeguards. They control peaks, prevent clipping, and make your track as loud as possible without causing distortion. A limiter is basically a very fast compressor with a ceiling: no sounds go above the limit you set.
Put the limiter at the end of your effects chain, with an output ceiling to about -0.2 dBFS. Then, lower the threshold until you see around 2 to 4 dB of gain reduction, which should make your track loud without making it sound unnatural. You’ll notice when you go too far because the beat will lose punch and everything will start sounding flat.
Set the release so the limiter moves with the beat: fast enough to make the song vibrant without creating a pumping effect.
Stereo Imaging
I love widening the stereo image of my tracks. Perhaps too much so!
Aside from not overdoing it, the main thing is to know which sounds should stay in the center and which ones can go to the sides.
As a rule of thumb, kick, snare, bass, lead vocal, and main synths should sit in the center of the mix. These are usually the backbone elements of a hip-hop track, and when they’re centered, they keep the groove and melody in the spotlight.
On the other hand, “secondary” sounds like pads, keys, strings, and atmospheric effects sound great when panned left and right to fill out the space. The same goes for percussive additions like hi-hats or shakers which add movement and width when off-center, but again, be careful not to overdo it.
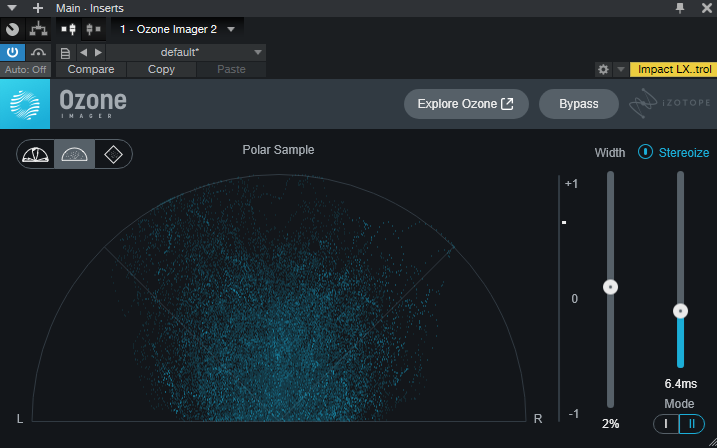
One thing I also do often is duplicate a track, pan the copies hard left and right, and delay one by 10 to 15 milliseconds. This gives a sense of immersiveness that works well with pads and longer textures. You can also use chorus or subtle modulation to add width without losing clarity.
Your DAW most likely has built-in stereo wideners and enhancers to help you see and adjust your stereo spread, but remember that some people do listen to music in mono (think of portable Bluetooth speakers), so make sure not to sacrifice tightness and cohesiveness.
Other Effects
After applying all the critical effects to your mix, you can try to use distortion, saturation or reverb to give your track a final polish or create a more interesting sound signature.
Use saturation to add analog-like warmth. It's also good if you feel your sounds are not glued together properly, because it'll provide them with an additional common trait that brings them closer together.
Light distortion adds grit and character to drums and vocals, so use it (with a touch of reverb) to add energy and cohesion.
Reverb is a bit of a double-edged sword. It can make your track more dreamy and realistic, but too much can blur the details, so keep it minimal and use just enough to add space.
All three effects, while mastering, should be used sparingly: it’s easy to compromise frequency balance at this stage, so make sure you monitor how your samples and their frequencies react to every change, and fine-tune every effect until it sounds just right.
Final Thoughts
This guide should give you a head start on how to make hip-hop beats sound professional. Remember that the secret is to keep experimenting: it can take years to learn how to master tracks professionally, and more likely, every time you learn a new trick, you'll look back at your discography and think how you wished you could re-master every single track you published!
It’s a slow, painstaking process, but enjoyable, nonetheless.
Remember to check out the Sample Focus library, where you can find countless samples professionally recorded and ready to be used.
Good luck!


Comments