

FL Studio is a powerful tool to make techno tracks. This guide explores its features and shows you how to create hypnotic rhythms and unique beats.
FL Studio in Techno Productions
Want to know how you make a techno track in FL Studio?
Despite being less popular for electronic music production than others DAWs – FL Studio is recognized for it's unique capacity to make techno beats.
So if you've been asking yourself if you make techno in FL Studio... the answer is absolutely.
Let's look at some techniques and tricks to help you make techno music in FL Studio.
This article will show you:
- Create techno beats in FL Studio using the Channel Rack, Piano Roll, and Step Sequencer. Layer percussion, experiment with hi-hats, and fine-tune swing for groove.
- Design robust basslines with FL Studio's BooBass or 3x Osc. Use sine waves, pitch modulation, and LFOs for movement.
- Craft ethereal pads with Harmor or Harmless. Use saw waves, filtering, reverb, and delay to create atmosphere.
- Master your techno tracks with proper mixing, compression, and limiting. Use Multiband Compressor and Fruity Limiter for punch and loudness.
- Get free techno loops and sounds at Sample Focus. Download royalty-free kicks, hi-hats, basslines, and more to enhance your production.
Getting Started with FL Studio
Start by setting up your virtual stack. FL Studio offers a user-friendly interface with features that are essential for creating high-quality techno music.
Setting up Your Virtual Rack
Start by configuring your virtual rack, ensuring that all the required instruments and effects are in place.
Essential Tools and Features in FL Studio
Channel Rack, Piano Roll, and Step Sequencer
- Sequence and arrange your tracks.
- Always experiment with these if you want to get techno rhythms and patterns that sound original.
Audio Clips and Automation Clips
- Learn to manipulate audio and automation clips.
- Add dynamic changes and variations to your tracks
- This makes your techno tracks more engaging.
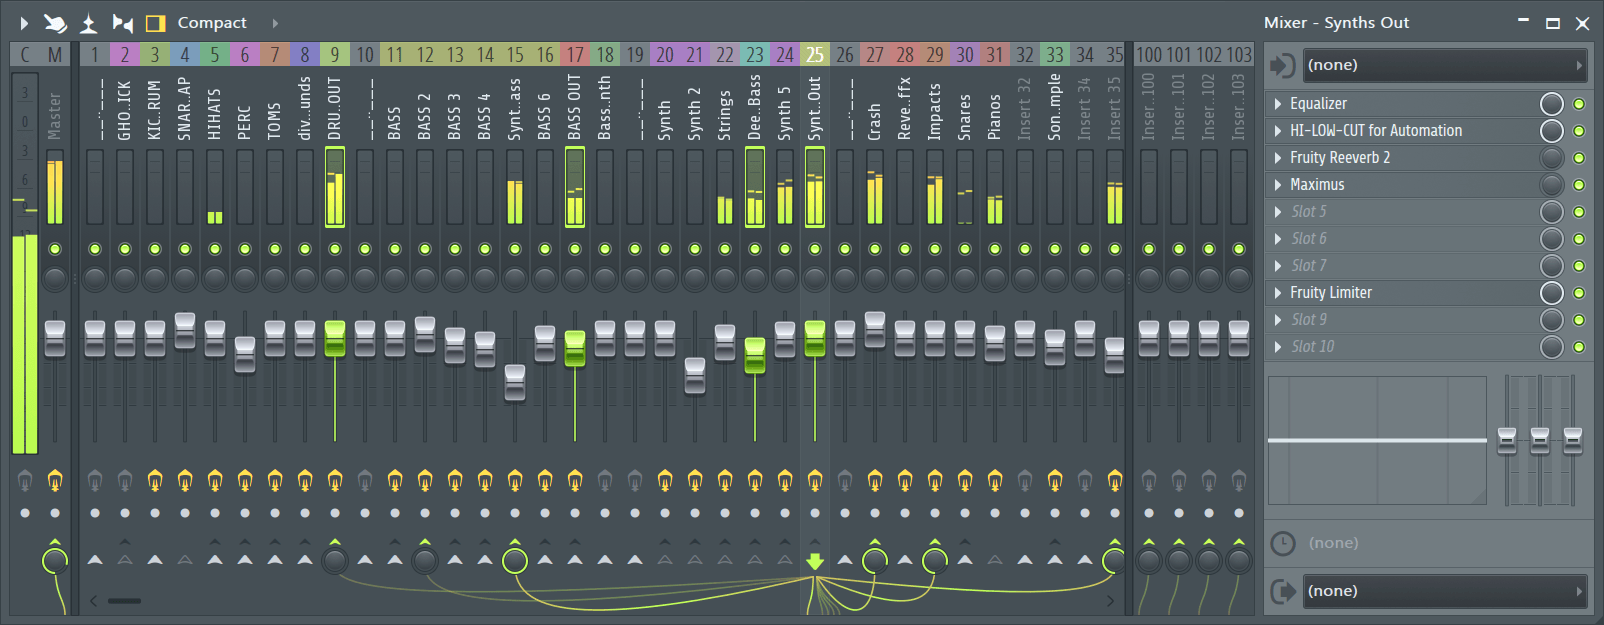
Mixer Track and Inserts
- Where balance the elements of your track, apply effects, and shape your sound.
- You need this if you want a polished sound.
Channel Rack for Beats & Rhythms
Start by selecting a punchy kick sample suitable for Techno.
For unique and rare beats check the Sample Focus collection to find your sound.
You can download free techno loops. All are royalty-free, and you'll find the techno beats you need.
 5
5.gif?1648056360)
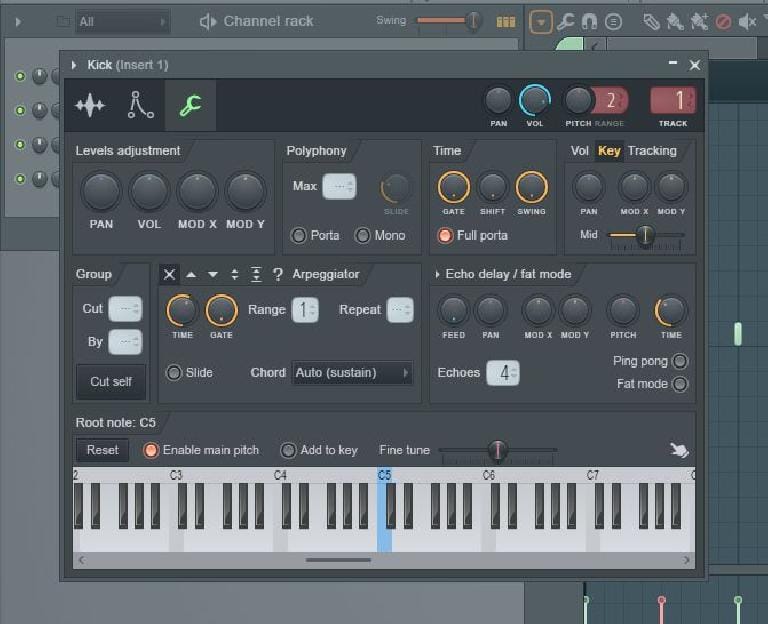
How to Use the Channel Rack for Techno Beats in FL Studio:
- Initiate with a Basic Pattern: Begin by setting up a basic 4/4 kick pattern. Ensure the BPM is set between 120-130 for that classic techno tempo.
- Layering Percussion: Introduce snares or claps on the 2nd and 4th beat. For added depth, layer multiple samples with slight variations in pitch.
- Incorporate Hi-Hats: Add closed hi-hats on every off-beat and experiment with open hi-hats for variation. Adjust the velocity to create a dynamic rhythm.
- Fine-Tuning with Swing: To add groove, adjust the swing parameter. Values between 10-20% offer a subtle yet effective groove.
👉 Tip: Check our Drum Programming Guide if you haven't yet.
Alternative Techniques:
- Experiment with off-beat kicks or layer multiple samples to add depth and character to your drum pattern.
- Use randomized velocity settings for your hi-hats to create a more dynamic and organic groove.
Get free techno hi hat samples:
15
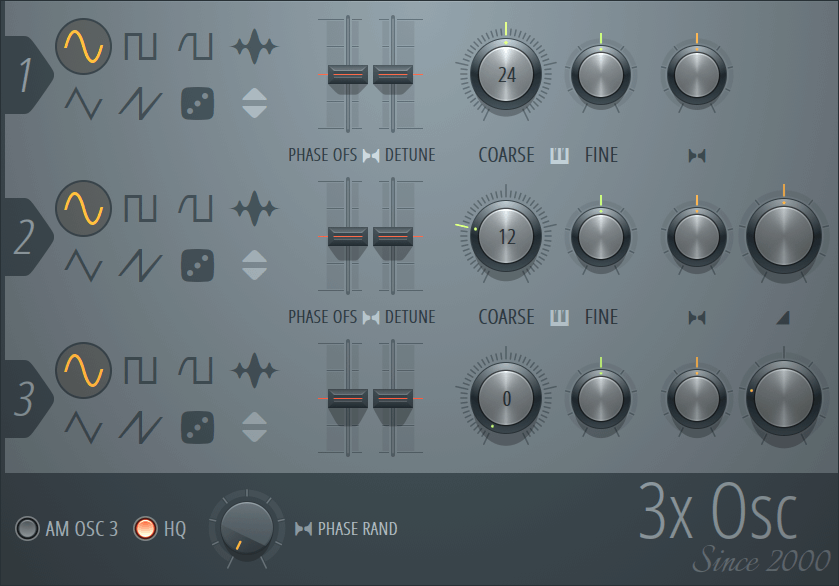
Deep Basslines with FL Studio 3x Oscillator
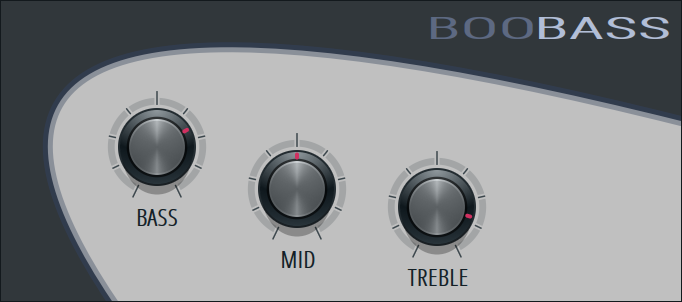
You can use FL Studio's BooBass or 3x Osc to design a robust bassline. Keep the bassline rhythmic and repetitive, staying true to the Techno roots. Values between 40-60Hz are ideal for the low-end frequency to ensure the bass is felt rather than heard.
The potential of BooBass and 3x Oscillator for Techno:
- Selecting the Right Waveform: Initiate with a sine wave for a deep, subby bass. Ensure the other two oscillators are turned off.
- Setting the Pitch: Drop the pitch of the oscillator to -12 semitones to delve into those lower frequencies crucial for techno.
- Modulation for Movement: Use the LFO section to modulate the pitch slightly. A depth of 5% with a speed of 0.1Hz can introduce a subtle movement to the bassline.
These synths offer powerful bass sound design. Here are some pointers for you to follow:
- Frequency: Aim for a fundamental frequency in the 40-60Hz range for a deep bass.
- Sub-Bass: Use a sub-bass (below 40Hz) to reinforce the bassline, even if it's barely audible.
- Octave/Pitch: Experiment with octave variations to create bassline movement.
- LFO (Low Frequency Oscillator): Use LFOs to modulate pitch, filter cutoff, or other parameters for subtle movement.
- Sound Design:
- Sine Waves: A pure sine wave creates a smooth, deep bass sound.
- Sawtooth Wave: For a brighter, grittier bass tone.
- Square Wave: Creates a sharper, more aggressive sound.
Alternative Technique
For a grittier bass, introduce a saw wave in the second oscillator and blend to taste.
Atmospheric Pads with Harmor
You can use Harmor or Harmless in FL Studio to craft ethereal pads. Try to go for wide, detuned saw waves with a plenty of reverb. Then, adjust the LFO settings to introduce subtle movement to the pads, making them more dynamic.
32
Creating Pads and Melodies with Harmor
- Initiating the Sound: Start with a basic saw wave. Increase the unison to 5 voices, introducing slight detuning for a wider sound.
- Filtering for Depth: Use a low-pass filter with a cutoff set at around 500Hz. Apply a slight resonance to accentuate the frequencies.
- Reverb and Delay: Introduce a sense of space with a reverb setting of 40% wetness and a decay of 2 seconds. A ping-pong delay with values between 50-150ms can add dimension.
- Alternative Settings: For darker pads, reduce the filter cutoff and introduce phaser effects.
Pro tips
- Unison: Increase the unison setting to create a wider, detuned sound (e.g., 5 voices for a subtle detuning).
- Filter Cutoff: Use a low-pass filter to shape the frequency response of the pad, adding warmth or darkness.
- Resonance: Increase resonance for emphasis on the filter cutoff frequency, giving the pad a more pronounced sound.
- LFO Rate: Adjust the LFO rate to control the speed of modulation.
- LFO Depth: Increase the LFO depth for a more pronounced effect.
How to Master your Techno Tracks in FL Studio
- Balancing the Mix: Ensure that your kick and bass are prominent, with other elements balanced around them.
- Compression Techniques: Use the Multiband Compressor with a ratio of 2:1 for the mids and highs. This ensures punchiness without sacrificing clarity.
- Limiting for Loudness: Introduce the Fruity Limiter and set the ceiling to -0.3dB. Adjust the gain until the track peaks at this level.
- Alternative Techniques: For a vintage vibe, use a tape saturation plugin post-compression.
Sample Focus Free Techno Loops & Sounds
12 3213
3213
Cheat sheet: Making Techno on FL Studio (Recap)
Drums
- Tempo: 120-140 BPM
- Kick: Control attack, sustain, decay, use high-pass filter (80-100Hz).
- Snare: Sharpen attack, adjust release, emphasize mid-range (2-4kHz).
Bassline
- Frequency: 40-60Hz fundamental.
- Sub-Bass: < 40Hz for reinforcement.
- Synths: BooBass/3xOsc, experiment with sine, sawtooth, square waves.
- Sidechain Compression: For "ducking" effect.
Synth Pads & Melodies
- Synths: Harmor/Harmless.
- Unison: Detuning effect, use 5 voices for subtle widening.
- Filter: Low-pass for shaping sound, increase resonance for emphasis.
- LFOs: For modulation, control rate and depth.
- Reverb/Delay: Add space and texture.
Mastering
- Multiband Compressor: Balance lows, mids, highs.
- Limiter: Maximize loudness.
- Fruity Limiter: Ceiling -0.3dB, adjust gain.
- Saturation: Add warmth (use sparingly).
- EQ: Final frequency adjustments.
- Stereo Imaging: Widening effect.
💡 Bonus reminder
Sidechain Compression
Use sidechain compression to create the 'ducking' effect, where the bass dips in volume when the kick drum hits. This keeps the bassline from clashing with the kick and creates a more rhythmic groove.
Final Words
Techno is about drums with rhythm and groove, a driving (and deep) bassline, atmospheric synth pads, and meticulous mastering. Start with drum programming in the Channel Rack – tempo between 120-140 BPM. Make a deep bass using synths like BooBass. For atmospheric pads use Harmor or Harmless. Don't forget to use multiband compression and a limiter to achieve a balanced master for your track.


Comments