Creating your own drum kit in Cubase is a great way to personalize your beats. This guide will help you build your first drum kit in Cubase, complete with tips, tricks, and practical examples.
Introduction
Presets are great for getting started, but customizing your drum kit allows you to inject your personal style into your tracks. By creating your own drum kit, you can make something truly unique that stands out. Let’s get started with Cubase!
What You Will Learn
- How to select and gather the right drum samples for your kit.
- Step-by-step setup process for creating a drum kit in Cubase.
- Detailed parameter settings for EQ, compression, and effects.
- Techniques for sequencing drum patterns and adding variations.
- Tips for layering sounds and saving your custom drum kit for future use.
Step 1: Gather Your Samples
Before opening Cubase, gather the drum samples you’ll use. Here’s what you need:
- Kick: A punchy, low-frequency kick.
- Snare: A crisp, snappy snare.
- Clap: A sharp, compressed clap.
- Closed Hi-Hat: A tight, percussive tick.
- Open Hi-Hat: A sustained hi-hat sound.
- Tom: A round, resonant tom.
- Variation Elements: Cowbell, tambourine, or shaker for added texture.
Create a folder on your computer and organize these samples for easy access.
Step 2: Set Up Your Project in Cubase
- Open Cubase and start a new project.
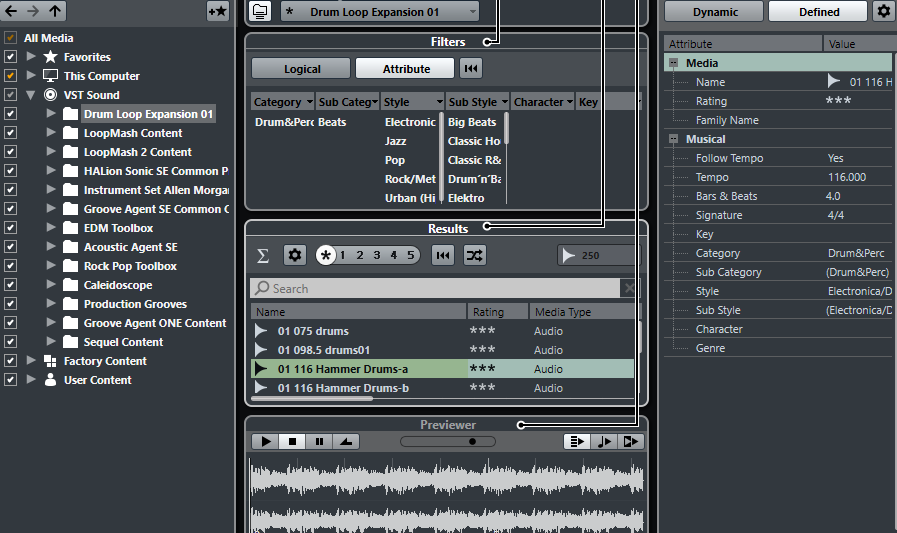
- Add Your Samples: Drag your folder of samples into Cubase’s media bay for easy access.
Step 3: Building Your Drum Kit
- Create a Drum Track: Add a new instrument track and select Groove Agent SE, Cubase’s built-in drum sampler.
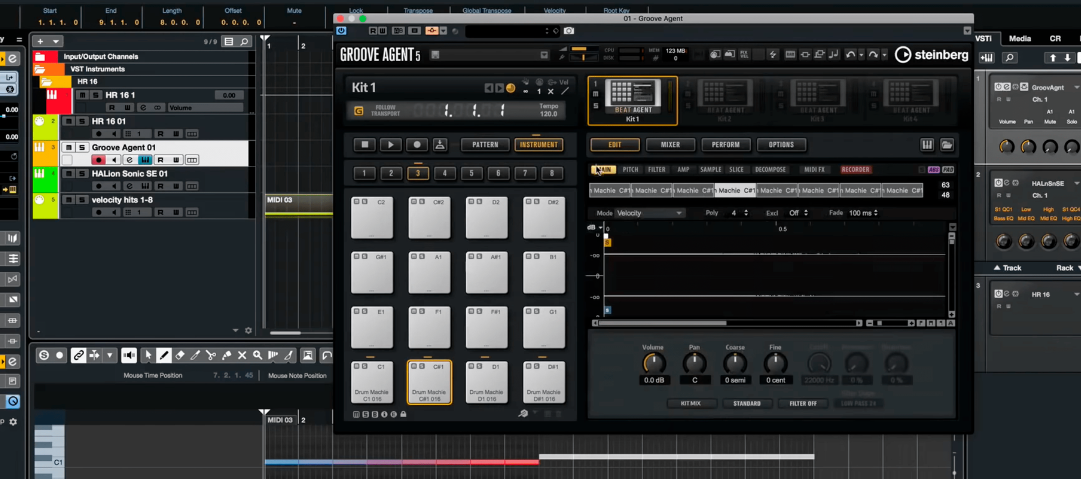
- Load Your Samples: Drag and drop your samples from the media bay into Groove Agent SE. Each pad in Groove Agent SE represents a different sample.
- Open the media bay (F5) and navigate to your sample folder.
- Organize samples into subfolders (e.g., Kick, Snare, Hi-Hats).
- Drag and drop each sample from the media bay onto the pads in Groove Agent SE, with each pad representing a different sample.
For example, assign your kick to pad C1, snare to D1, and hi-hats to F#1 and A#1. This setup helps you quickly identify and sequence each sound.
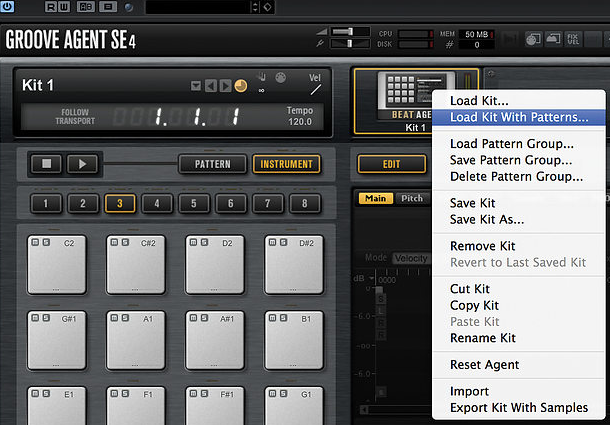
Groove Agent SE’s interface lets you tweak each sample’s pitch, volume, and pan directly from the pad settings. You can also apply effects like reverb and delay to individual samples, enhancing your drum kit’s overall sound.
The Breakdown
Kick Drum
- Selection: Look for a kick that’s punchy with a good sub-bass presence.
- Example: Use a sample like "basic-kick" that isn’t too loud and is fairly short.
- Parameter Settings:
- EQ: Boost around 60-80 Hz to enhance the low end, and a slight cut around 200-300 Hz to reduce muddiness.
- Compression: Set a ratio of 4:1, with a fast attack (5-10ms) and a medium release (100-150ms).
Snare Drum
- Selection: Choose a snare with a crisp attack and a short decay.
- Example: An acoustic snare, like "proper-snare," can add a natural feel to your beat.
- Parameter Settings:
- EQ: Boost around 200 Hz to add body and around 2-4 kHz for presence.
- Compression: Set a ratio of 3:1, with a medium attack (10-20ms) and a medium release (100-200ms).
Clap
- Selection: A compressed clap that cuts through the mix is ideal.
- Example: Use a sample such as "clap-for-production-9."
- Parameter Settings:
- EQ: Boost around 1-2 kHz for brightness and clarity.
- Compression: Set a ratio of 2:1, with a fast attack (1-5ms) and a fast release (50-100ms).
Closed Hi-Hat
- Selection: A tight, percussive hi-hat to maintain the rhythm.
- Example: A clean, short hi-hat sample like those found in "hi-hat-loop-7."
- Parameter Settings:
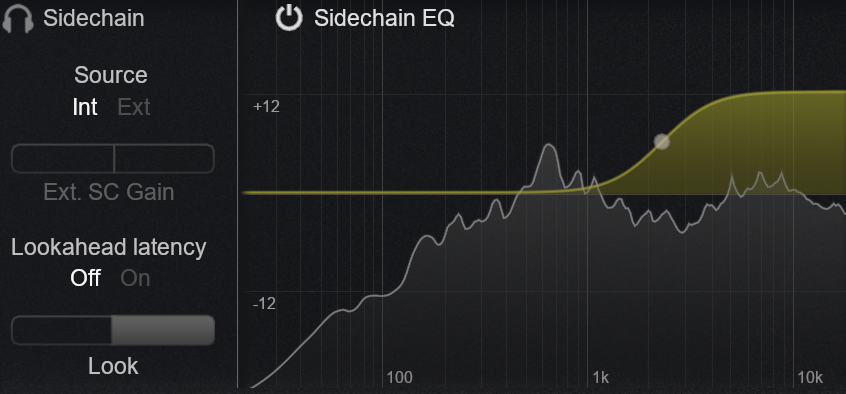
- EQ: Cut below 200 Hz to remove any unnecessary low frequencies and boost around 10 kHz for sparkle.
- Compression: Light compression with a ratio of 2:1, fast attack (1-5ms), and fast release (50-100ms).
Open Hi-Hat
- Selection: A sustained open hi-hat to punctuate the beat.
- Example: "fire-hi-hat-vol-2-bright-noisy" provides a good sustained sound.
- Parameter Settings:
- EQ: Similar to closed hi-hat, cut below 200 Hz and boost around 10 kHz.
- Compression: Light compression with a ratio of 2:1, fast attack (1-5ms), and fast release (50-100ms).
Tom
- Selection: Choose a tom that adds depth and fills out the sound.
- Example: A resonant tom like "soft-tom."
- Parameter Settings:
- EQ: Boost around 100-200 Hz for body and cut around 400-600 Hz to reduce boxiness.
- Compression: Set a ratio of 4:1, with a medium attack (10-20ms) and a medium release (100-200ms).
- Cowbell: Adds a distinctive, rhythmic element.
- Example: "cowbell-hit-8."
- Parameter Settings: Light EQ to boost around 1 kHz and compress if needed.
- Tambourine: Provides a high-frequency texture.
- Example: "vinyl-tambourine."
- Parameter Settings: Light EQ to boost around 5-10 kHz and compress lightly.
- Shaker: Adds a subtle, percussive layer.
- Example: "spicy-shaker."
- Parameter Settings: Light EQ to boost around 5-10 kHz and compress lightly.
Adding Effects and Tweaks
- Application: Add reverb to give your drum kit space and depth.
- Settings: Use a short decay time (1-2 seconds) for snares and claps, and a longer decay (2-4 seconds) for toms and open hi-hats.
- Example: In Cubase, use the REVelation reverb plugin.
- Snare Reverb: Set decay to 1.5 seconds, pre-delay to 20ms, and mix level to 30%.
- Tom Reverb: Set decay to 2.5 seconds, pre-delay to 30ms, and mix level to 40%.
- Kick Drum: Boost the low end around 60-80 Hz and compress with a ratio of 4:1.
- Snare Drum: Enhance the mid frequencies around 200 Hz and 2-4 kHz, with a compression ratio of 3:1.
- Hi-Hats: Cut the low frequencies below 200 Hz and boost around 10 kHz.
- Chorus: Apply a light chorus to your hi-hats to add width.
- Example: Use the Cubase Chorus plugin with depth set to 20% and rate to 1 Hz.
- Phaser: Use a phaser on your snare for a sweeping effect.
- Example: Use the Cubase Phaser plugin with a rate of 0.5 Hz and depth of 50%.
Sequencing Your Drum Patterns
- Create a MIDI Track: Add a MIDI track and set its output to Groove Agent SE.
- Draw in Your Pattern: Use the piano roll to sequence your drum pattern. Start with a basic beat and gradually add more complexity.
- Basic Pattern: Kick on beats 1 and 3, snare on beats 2 and 4, hi-hats on every beat.
- Add Variation: Introduce open hi-hats, toms, and variation elements to add interest.
- Layering Sounds: Combine different samples to create a fuller, richer sound. For example, layer a short kick with a longer sub-bass kick.
- Experimentation: Don’t be afraid to try new things and see what works. Play around with different effects and sample combinations.
- Save Your Kit: Save your drum kit as a preset in Groove Agent SE for future use. This will save you time and allow you to quickly access your custom sounds.
Example Beat Creation
Let’s create a simple beat to see how all these elements come together. We’ll use the following samples and settings:
- Kick: "basic-kick"
- EQ: Boost 60 Hz by 4 dB, cut 250 Hz by 3 dB.
- Compression: Ratio 4:1, attack 10ms, release 150ms.
- Snare: "proper-snare"
- EQ: Boost 200 Hz by 3 dB, boost 3 kHz by 5 dB.
- Compression: Ratio 3:1, attack 15ms, release 120ms.
- Clap: "clap-for-production-9"
- EQ: Boost 1.5 kHz by 4 dB.
- Compression: Ratio 2:1, attack 2ms, release 60ms.
- Closed Hi-Hat: "hi-hat-loop-7"
- EQ: Cut below 200 Hz, boost 10 kHz by 3 dB.
- Open Hi-Hat: "fire-hi-hat-vol-2-bright-noisy"
- EQ: Cut below 200 Hz, boost 10 kHz by 3 dB.
- Tom: "soft-tom"
- EQ: Boost 120 Hz by 5 dB, cut 500 Hz by 3 dB.
- Compression: Ratio 4:1, attack 15ms, release 150ms.
- Cowbell: "cowbell-hit-8"
- EQ: Boost 1 kHz by 2 dB.
- Tambourine: "vinyl-tambourine"
- EQ: Boost 6 kHz by 3 dB.
- Shaker: "spicy-shaker"
- EQ: Boost 8 kHz by 3 dB.
Sequencing Pattern:
- Kick: Place on beats 1 and 3.
- Snare: Place on beats 2 and 4.
- Clap: Layer with the snare on beats 2 and 4.
- Closed Hi-Hat: Place on every eighth note.
- Open Hi-Hat: Place on the "and" of the fourth beat.
- Tom: Use sparingly for fills.
- Cowbell, Tambourine, Shaker: Add for variation and texture.
You can also check out Steinberg's official site for more tips on getting started. They have a video on helping you get up and running.
Final Words
By following this guide, you should have a custom drum kit that reflects your personal style in Cubase.
- Gather and organize your drum samples before starting.
- Set up your project in Cubase and add your samples to the media bay.
- Use Groove Agent SE to load and assign samples to different pads.
- Apply EQ and compression settings for each drum component.
- Sequence your drum patterns using Cubase's MIDI track and piano roll.



Comments